Long range scope zeroing
Long range scope zeroing
Sighting in a rifle for long range shooting.
I just mounted a new twelve power Nikon Prostaff 3 scope to my savage FTR in 6.5×284 and I want to get it set up so that zero is absolutely correct. Zero means making the point of aim and the point of impact coincidental at a specific range. I’m going to try to keep this less than 100 percent technical as there’s really no reason to take the exercise that far.
Personally, I like to sight my rifles and at 100 yards. However, in this case since the 6.5×284 is a long-range setup by definition, we’re going to take the zero out to 200 yards. What this means is that at 100 yards the point of impact is going to be a little bit high because the bullet will still be ascending. But at 200 yards, our intention is to be spot on. And in this particular case assuming the same bullet, weight, construction, and powder charge, you should be able to mentally calculate the offset between the two ranges. But the 200 yard zero will become a baseline for making future adjustments.
The very first step in sighting in is getting on the paper. Unless you’re on the paper you have absolutely no idea where the bullets are going. You, of course, could try shooting at the extreme corners of the target, and hoping that something lands on the paper, so you have a point of reference, but that’s not the best way to start the exercise. However, it is a good way to burn through a box or two of expensive ammo. The best way to start the exercise is to put your target 25 yards from the muzzle. This distance is typically known as the near zero. For almost any rifle with a scope center mounted 1.5” above the center of the bore line, with a bullet travelling at 2,600 to 3,300 feet per second, the near zero will be about 27 yards. Now what is the new zero? Picture this, the line of sight is a perfectly straight line, but the path of the bullet is a hyperbola, and this path of the bullet crosses a line of sight at two points. The first point is the near zero, the second point is the far zero. In other words, when it comes to elevation, if you are spot on at the near zero you will also be spot on at the far zero.
OK, we have the technical information out of the way. The next step is to look through your scope and look at the target. Of course, you’re going to see a perfect target picture, and you’ll be able to center the crosshairs. But this doesn’t mean you’re sighted in. Let’s assume that you have a bolt action like the Savage FTR that we’re sighting in. The next step is to remove the bolt and get the gun firmly seated in a rifle rest and/or on sandbags and then look through the bore. When you look through the bore if you can get this target centered in the center of the bore, and then look through the scope and see where the crosshairs go, you’ve accomplished the first step of bore sighting. In all probability, the crosshairs will not be on the dead center of the target. Therefore, remove the turret caps on the scope, and using an appropriate device, coin, screwdriver, or your fingers, turn the adjustments until you walk the center of the crosshair onto the center of the target. Then reconfirmed by looking through the bore of the scope and the bore of the gun, to make sure that this has taken place. If you’ve done this you are now bore sighted.
Now load the gun and take your first shot. This should put you reasonably close to the point of aim. If it doesn’t, make the appropriate scope adjustments. Keep in mind that the scope we have on this gun has 1/4 MOA clicks. That means that each click of the windage or elevation adjustment will move the point of impact 1.06” at 100 yards, and coincidentally, about ¼” at 25 yards (this is why we chose 25 yards for the near zero range). This means you need to either eyeball or measure the distance from the center of the target to the point of impact, and make the appropriate adjustments on your scope. Now go back and take one more shot. In all probability this shot will cut dead center through the point of aim. If it doesn’t, it probably means you messed up something when you made your scope adjustments.
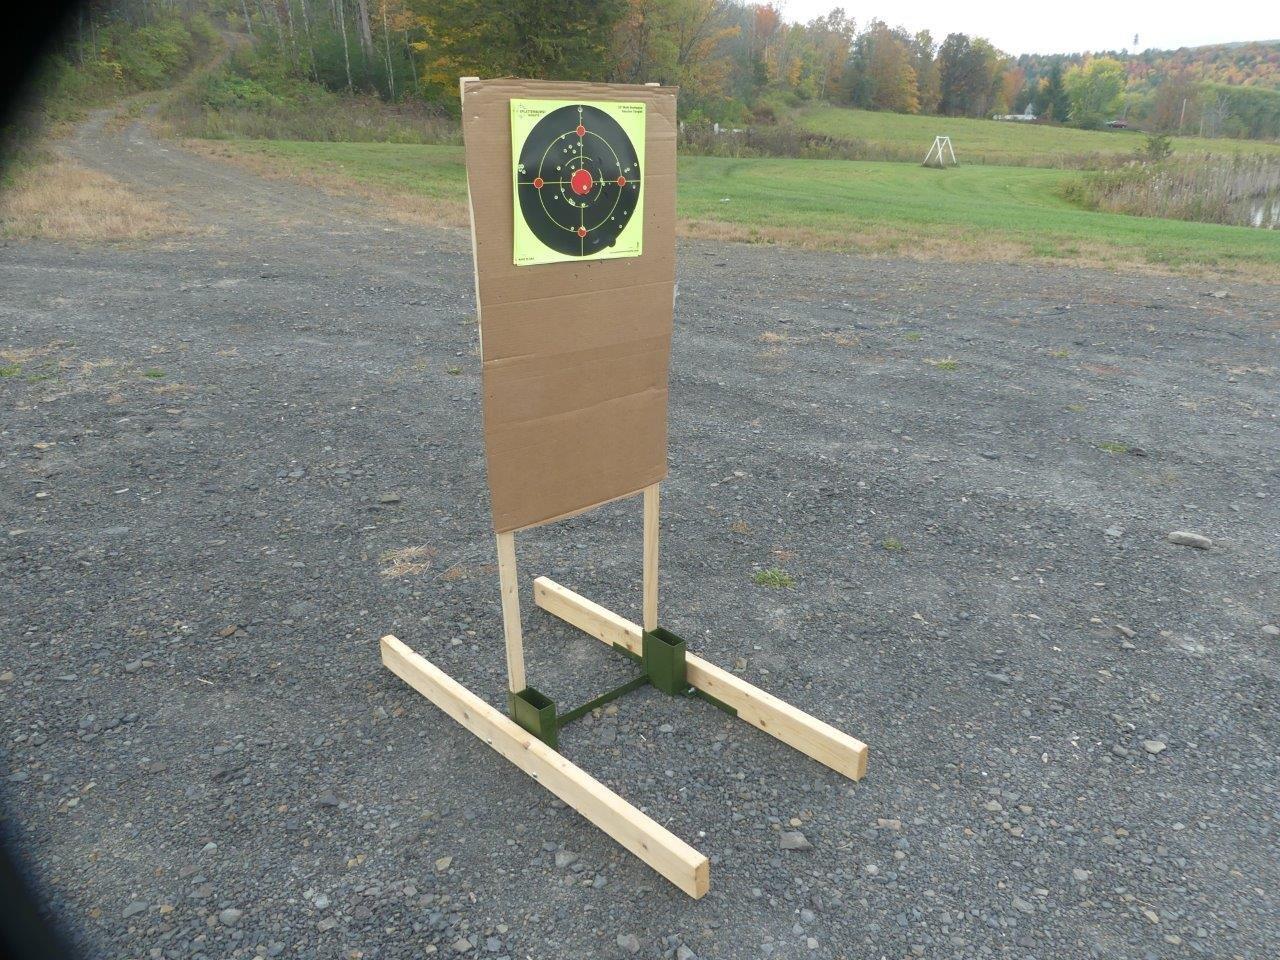
Now we’re ready to get to the serious part of getting zeroed in at 200 yards. However, it’s also a good idea to see where the point of impact versus the point of aim is at 100 yards as this is an important point of reference. The way to do this is to put out to target stands, each with a target on them. I have found that the best target stands to use are the Hyskore www.hyskore.com 30291 Target Hound Stands, https://hyskore.com/products/30291-target-hound/ which are easily portable, inexpensive, and ruggedly built. You can set these up both at the 100 yard point, and the 200 yard point, and here my recommendation is to use some Birchwood Casey Sight and See targets, so that it’s easy to visualize the point of impact. Expanding on this point, it’s also an excellent idea to have a good quality spotting scope located near your rifle, so you can easily reference the point of impact versus the point of aim. We’re also going to make one more assumption during our sighting in exercise, and that is that there is no wind on this day, as wind adjustments can sometimes be more art than science, and we’re not going to get into that at this point in time.
Okay, here we are back at the shooting bench. Now what you need to do is load the gun, get to a secure solid shooting position on a solid bench with the gun firmly settled on your rest bags, get a good sight picture, slowly squeeze the trigger, and take one shot at the dead center of the 200 yard target. If you’re on the paper and you can see where the bullet impacted, it’s time to take four additional shots. Never use just one shot to evaluate zero simply because a single shot could deviate from the average shot placement for a whole range of different reasons ranging from flinching, to a loose scope mount.
Now that you’ve located the center of your group, take the appropriate measurements to find out how far it deviates from this point of aim, if any, and make the appropriate scope adjustments. Remember that at this range each click will move the point of impact approximately ½”. If you’re on the money that’s great. If you’re not, make the appropriate adjustments, fire another five shot group. The point of impact and point of aim should now be coincidental. With this particular gun, and the right ammunition from makers such as Speer, Norma, or Hornady, at 200 yards you should be able to shoot groups that are less than 1.5” in diameter.
There is an even easier way to do the initial zeroing in process. By using the five shot sighting in method, which is facilitated by using the Hyskore www.hyskore.com 30022 Parallax Sighting Vise https://hyskore.com/products/30022-cleaning-sighting-rest-2/.
This great device will allow you to do your rough sighting in at 25 and 100 yard targets, and then you can easily refine the process by adjusting the scope to get the point of impact and point of aim coincidental.
No Comment